There's something deeply satisfying about building your own clay pizza oven. It's a project that brings together earth building, good food and good company – and the oven you end up with will outlast any flat-pack barbecue by decades. Build it with friends or family and the process itself becomes part of the story.
What You'll Need
The materials list is refreshingly short:
- Clayey subsoil as a binder
- Sand for structure
- Straw for tensile strength
- Firebricks for the baking surface
- Stone for the foundation
Most of this is cheap or free. Sand from a local builder's merchant, straw from a nearby farm, and clayey subsoil often straight from your own garden. It's one of those rare projects where the materials cost almost nothing.
Choosing the Right Spot
Location matters more than people think. You want somewhere easy to access, sheltered from the wind and well away from overhanging trees. If you can position the oven under a canopy or roof overhang, even better – you'll be able to use it year-round and the structure will last much longer without getting soaked every time it rains.
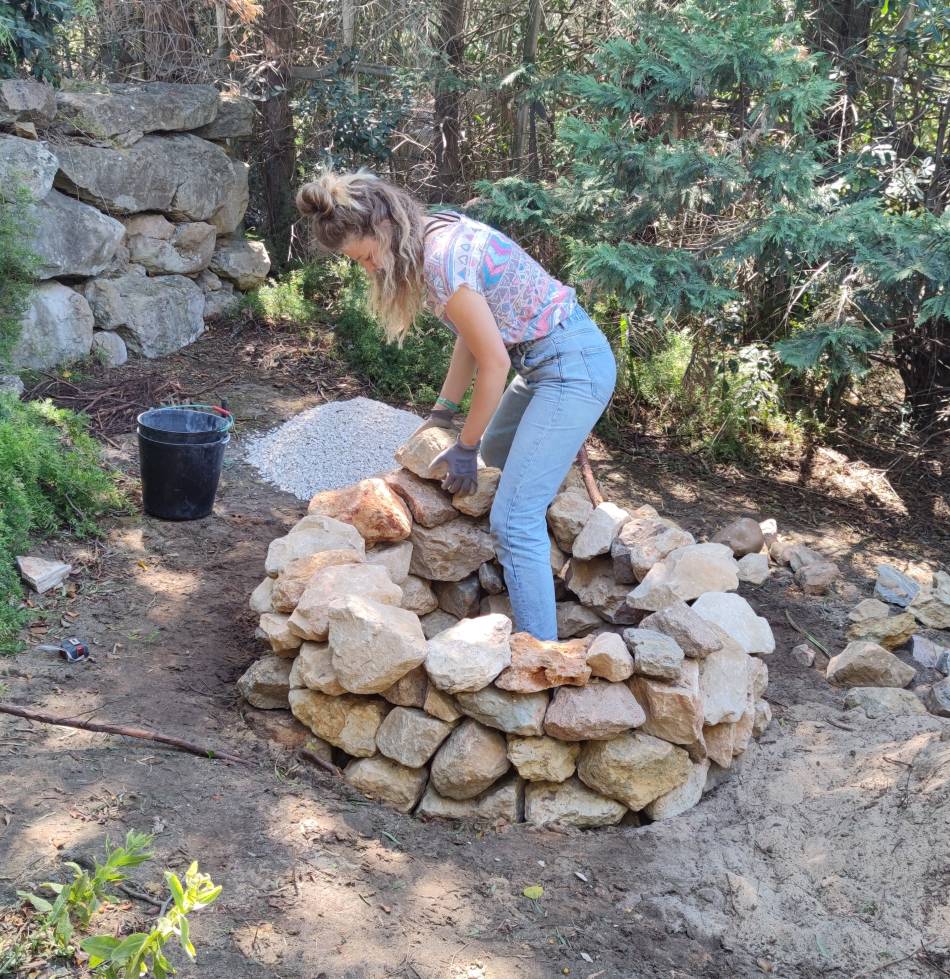
Getting the Foundation Right
Don't rush the foundation – everything else sits on top of it. A stone base with a gravel drainage layer underneath works really well. Build up a round stone wall to your preferred working height, fill it with gravel or sand, and you've got a stable, moisture-resistant platform that will serve you for years.
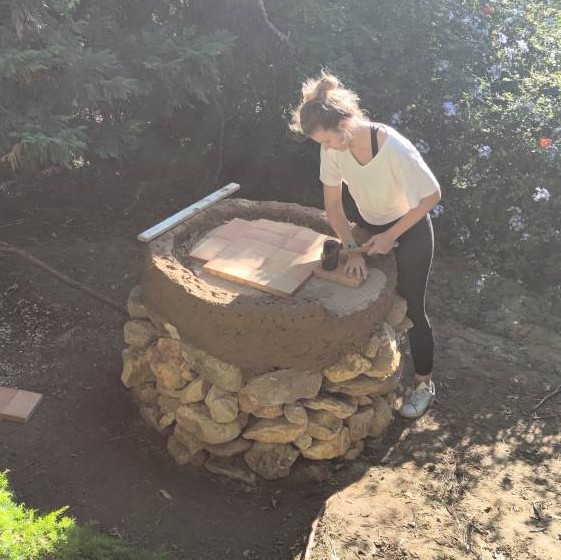
The Insulated Oven Floor
Good insulation is what separates a pizza oven that works from one that doesn't. The goal is to keep the heat inside and distribute it evenly across the baking surface. A layer of recycled glass bottles or sawdust, topped with a thin bed of sand, does the job beautifully. The firebricks go on top – that's your actual baking surface, and it's worth getting right.
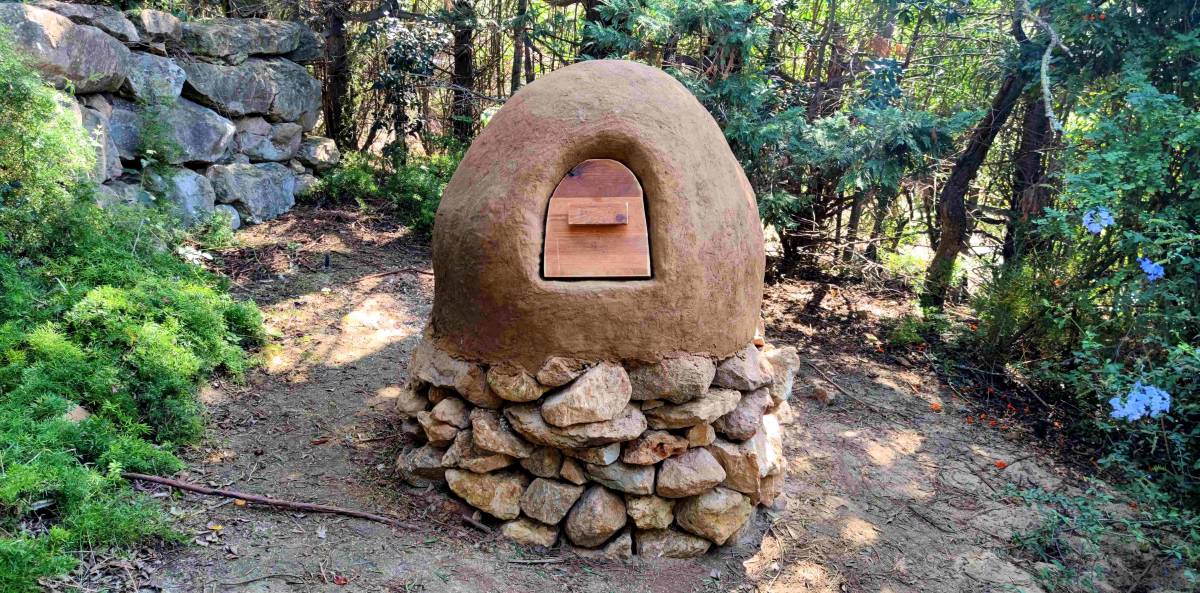
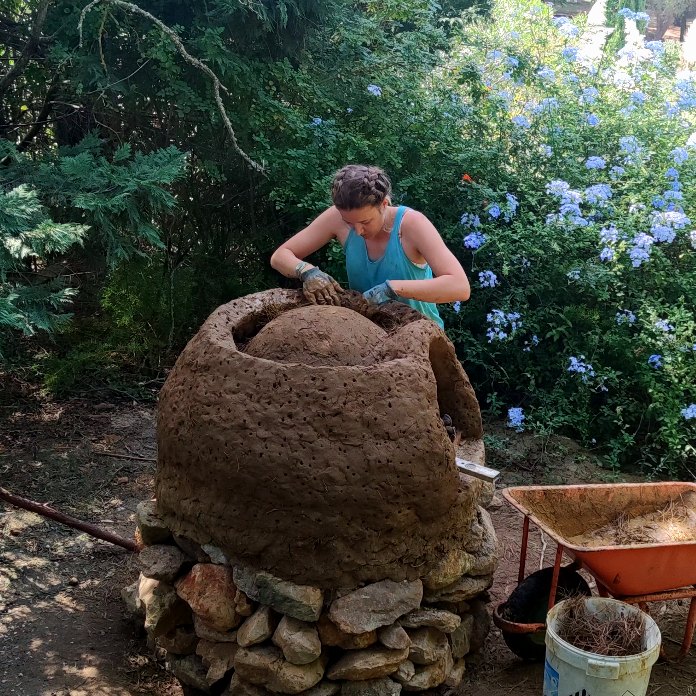
Building the Dome
The dome is where the magic happens – and where you really get your hands dirty. Start by shaping a temporary sand dome as a former. Apply your first dense clay layer over it, then leave it to dry. Once that's set, add a second, wider dome with an insulating layer of straw or wood shavings sandwiched inside. The outer layer gives the oven its final shape and adds another buffer of insulation.
The Door and Final Steps
A simple wooden door is all you need to finish the oven off. But before you fire it up for the first time, give it proper time to dry – several weeks, depending on the weather and humidity. It's the one part of the process where patience really pays off. A fully cured oven will reward you with years of wood-fired pizza; a rushed one will crack and disappoint.
Want the full picture? Our step-by-step guide “Build an Earthen Pizza Oven” walks you through every stage with detailed instructions and a handy printable checklist.
